Photo Editing with Pattern Backgrounds
This weeks inspiration comes from
rebeccacooper.blogspot.com

This was just absolutely amazing to find this editing feature.
I took my ordinary white sheet background
and created a vintage textured background.
You can visit Rebecca's blog above to show you how she went from plain to wow.
Here I will show a little bit different method
using Adobe Photoshop Elements.

First I searched on photobucket.com for texture backgrounds that I could use.
Once I found a background I liked I saved it to my computer.

Next I opened Photoshop Elements

Go to File and open up your photo you are going to edited

Now edit your photo to your liking.
I cropped my photo and cloned out the shadow in the background and then I edited the photo with a vintage effect.

Now go back up to File and open your Background Pattern photo


Now click on your photo in project bin at the bottom of your editor

Now drag your pattern background on top of your photo


Stretch your pattern over your entire photo


Now go to the right of your screen in the Layers column
and
lower the opacity of the patterned background

Now Click on the Normal where it says Pass Through in the Layers column

Next travel to your left column and click on the eraser tool
and
start erasing the pattern from your figure


After you are finished erasing the pattern from your figure
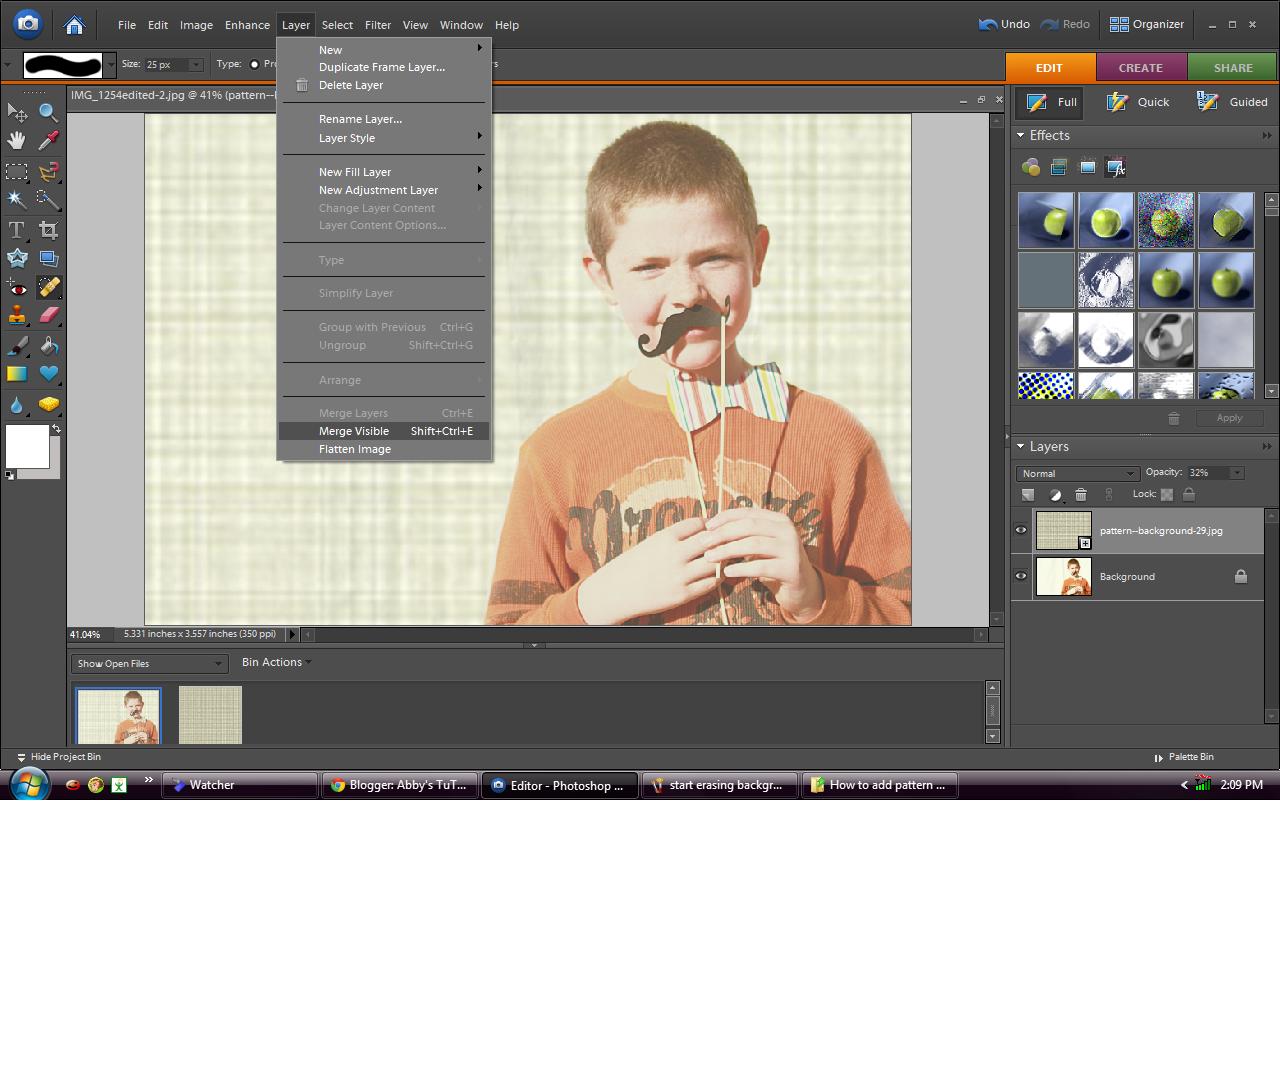
click on Layer at the top of the screen and
scroll down to Merge Visible

Your Finished!
If you are happy with your result
just click and save!


Comments
Post a Comment