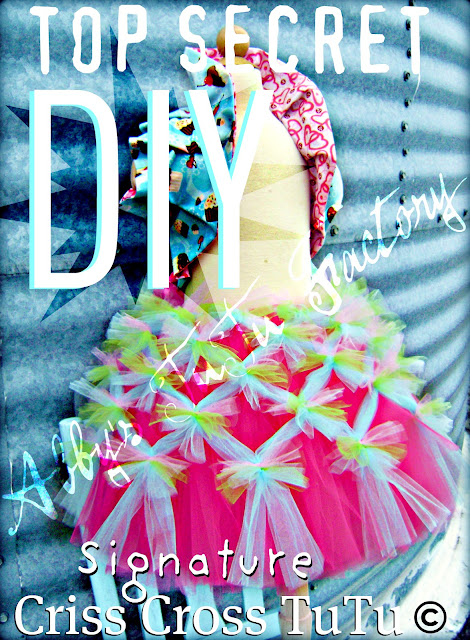
How to make Abby's TuTu Factory signature criss cross tutu
Pin It


Here it is a step by step instruction on
How To Make my signature criss cross tutus

This tutorial is for personal use only
You may not use this tutorial for retail
or to sell individually or to sell in stores or online
Thank You
Supplies Needed:
Tulle
Scissors
Ribbon
Straight pins
dress form
hot glue *optional
Step 1:
Take waist measurements where the tutu will sit on the waist
Next gather your ribbon
Cut your ribbon
waist measurement + 20 inches + 20 inches = total length of ribbon


Step 2:
Cutting the tulle
The best length of tutu for the criss cross tutus is 14 inches or longer.
Today I am making a 14 inch tutu
For the tutu cut your tulle strips
28 inches long
Start by cutting
100 strips
for your tutu


Next cut the tulle for the criss cross overlay
These tulle strips need to be at least
16 inches longer than the tutu
Criss Cross Overlay
44 inches in length
You will need
20 strips total


Step 3:
Making the tutu
Gather one tulle strip and make a loop with your fingers
shown in photo below

Place your loop under the ribbon at the 20 inch mark


Pull the ends thru the loop


Pull tight

Repeat for the next 5 strips of tulle

Now after the 5 blue tulle strips
add 1 pink strip

Repeat pattern
5 blue tulle strips and then 1 pink strip

As you make your tutu, keep pushing the tulle close together
Once you are finished your tutu should look like photo below
See how far apart the pink tulle are from each other

Step 4:
Making the criss cross overlay
Tip #1
To make the perfect criss cross overlay you will to put your tutu on a dress form
or
on a fabulous model who will stand still for you ;)
The purpose of the dress form/mannequin
is because the tulle lays perfectly over the figure and keeps it fluffed out while you make the criss cross overlay.


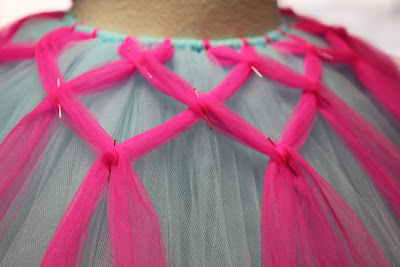
Now take your straight pins and make your first criss cross
Pin in Place
Pin the first row of criss cross as close to the top as you can

Keep repeating the process all the way around the tutu.
IMPORTANT*
Keep each criss cross identical from each other.


REMEMBER
When you get to the back of the tutu make your criss cross wide enough to be able to slide the tutu on and off the mannequin

Now start row #2
making sure you are directly in the middle of the top row

Tip #2
Having perfect symmetry is very important for each criss cross

Starting row #3 keep checking the shape of your criss cross overlay
making sure it is starting to bell out


Row #4 you can start to see how the criss cross start to become a little wider


After Row #4 you are finished pinning your criss cross.
If you have enough length on your tulle you can make a row #5
pictured below

I kept only 4 rows and then trimmed the excess tulle even with the tutu

Now check your work and make sure you have a good shape all the way around the tutu.
If you do not have the shape you want you will need to take apart the criss cross and start over :(


Step 5:
The fun part!
Here you can choose what accessory you will attach to your criss cross overlay.
Since hot glue works wonderful with the tulle
the options are limitless!
You can use
Pompoms
sequins
pearls
rhinestones


I am making my fun criss cross confetti tutu
so I am using
square cuts of tulle
Start by cutting 3" x 6" pieces of tulle

Next tie your first square to the criss cross overlay.
Now pull the pin and set aside

Then take your second color and tie right above the first color

Next take your third color and tie right below the first color

Repeat this process at each criss cross

After I got started tying the tulle squares I noticed I need another color to "pop"
So I added green to the mix.
Please tag or send in your photos of you beautiful creations using this tutorial to Abby's TuTu Factory Facebook Fan page


thank you so much for sharing this information. i can't wait to make some for my spring mini shoot. i LOVE the one i bought a couple years ago and will be thrilled to have more colors for the shoot. you're such a talent Britt, you're going to continue to go far and SHINE! xoxo
ReplyDeleteThank you so much
DeleteThat is amazing. Thank you for sharing!
ReplyDeleteThis is SO cool. Thank you for sharing. I am dying to make one.
ReplyDeleteBeautiful work!
ReplyDeletetks
You made this look so easy...I will be trying this tonight! Thank you for the post....
ReplyDeleteLoved this! Just made one for my daughter and it turned out beautifully! Thanks for the detailed instructions.
ReplyDelete